Sunday, April 12, 2020

Flowers for Spring

Although my roses haven't even started to come up yet, this retired rose stamp on my shelf caught my eye, and I decided to play with it for a few challenges today. Here is my card...


 To make this card, I was inspired by the CAS color challenge to use Petal Pink, Mint Macaron, and Highland Heather from Stampin' Up. As you can see, my card base is Highland Heather, and I used all three colors to fill in my flowers. The dsp framing the image is from the Garden Lane paper pack. To make my image pop, I stamped the image twice, and cut out the inside of the flowers to layer them up. I tried curling the petals and adding some pretty purple bling to the center. The coloring was so relaxing! Thanks for looking!

If you haven't checked out the challenge from Craft Stamper this month which is Anything Goes, you should! Lots of ideas and a prize!

I also made it a Birthday card to match the Seize the Birthday challenge this week. I think it will be perfect for  my mom whose birthday is coming up!

Have a great Easter!

Friday, April 10, 2020

Spring Birds

Hello everyone! Even though we had a dusting of snow around here yesterday, I was inspired by a few challenges to create a card that says "Spring is here." Check it out...


To make this card, I relied on my Stampin Up Bird Ballad paper along with the Free as a Bird Stamp set and Detailed Band dies. For my color choices, I was inspired by the Color Throwdown challenge this week to use orange, green, yellow, pink as you see from their picture here:
For my design, I relied on this sketch from Stamping Pals. Once I picked my paper Bird Ballad from Stampin' Up, the card came together pretty quickly. I liked the idea of moving the birds down lower on the card to match the sketch.
Another challenge that got my creativity going was from the Tic Tac Toe Card Challenge because I had to think about what other elements I could use. I chose to line up the pink, yellow, and orange colors, but I also added some sparkle and flowers to my design.
Overall, this was a very fun card to make...hope you enjoyed it and are having a great spring day!


Wednesday, April 8, 2020

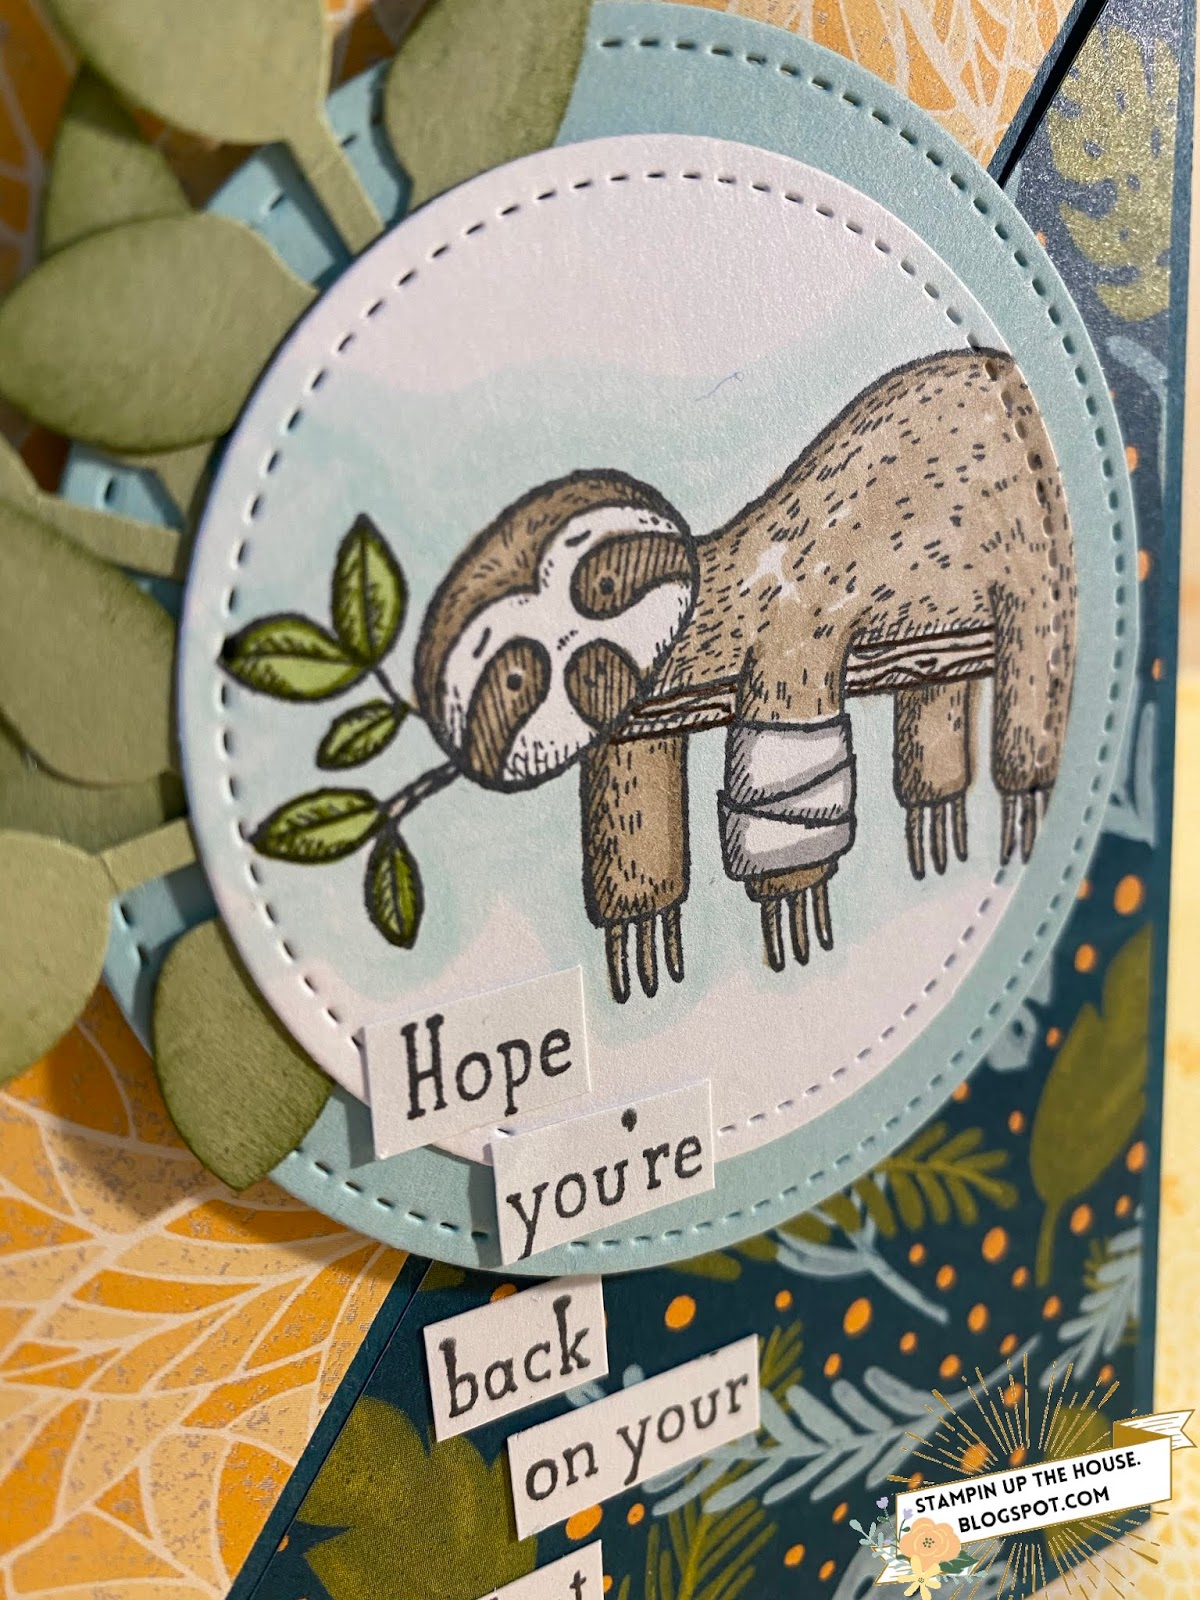
Back on Your Feet Card

Hello everyone! I'm going to be honest...there have been days when I've felt like this little guy from this cute animal set called Back on Your Feet by Stampin' Up. Hasn't everyone?! :)

It seems perfect for a few challenges today. The Paper Players are hosting a theme challenge "A Day at the Zoo", My Inkie Fingers is hosting a challenge called Make it Pop!,and Sunday Stamps has a sketch challenge "split in two." Here is my card using the cute little sloth image. I popped him up with some leaves and had fun coloring him in. The DSP is from Stampin Up's Dinoroar and Mosaic paper packs. Thanks for looking!
Thanks for checking out my blog today! Stay safe and healthy!

Wednesday, April 1, 2020

Magical Unicorn Birthday

Happy April! Grateful that today the sun is shining and it is warm outside. I'm also grateful for my niece who will be having a birthday soon. She is the inspiration behind my card today as well as the SUO challenge sketch seen here...
Here is my take on the sketch after channeling by 1980s self and thinking of a card that my niece might like!
 I have to say that it was really fun to break out my new Leave a Little Sparkle unicorn set and pair that with the SAB Lilypad Impressions paper. The sentiment is from the Magical Mermaid set. Here is a closer look.

Thanks for stopping by!

I'm also linking up to these challenges:
Crafty Creations - Anything Goes
Crafter's Cafe - Anything Goes

Sunday, March 29, 2020

A Garden Ready for Spring

Even though it snowed here yesterday, I feel like spring is just around the corner, and I cannot wait! Today, I went for a few walks and listened to the birds calling to each other, unaware of the strange new world we find ourselves in. I tried to capture the feeling of spring for the SUO challenge and the Sunday Stamps Challenge with my card today using the Grace's Garden stamp set by Stampin' Up. It is such a beautiful set!
I haven't been able to get my hands on the dies yet, so I made an opening of my own for the gate to frame using two of my circle punches.The flowered paper is from the Best Dressed 6x6 paper stack and the Garden Lane DSP, and the sentiment is from an old hostess set called "Very Vintage".

The little bird was my last touch...looks like he is waiting to say hello to anyone who pops through the gate!
Thanks for stopping by!

Also created for the Spring Florals Challenge here!


Tuesday, July 14, 2015

Artistic Dragonfly Large Side-Step Card with Video

I have yet another card using the Awesomely Artistic set by Stampin' Up today. I was recently in a challenge where I had to use one new set from the catalog to create 3 new projects, and this is number 2! You can see the first one here!


Lots of new items from the catalog were used to make this lovely card. To show you how I did it, I created a short video and included a project list below:


I was inspired by these challenges:

Monday, July 13, 2015

2 Step Layer Center Fold Card Video Tutorial!

As promised, here is the video tutorial for the card you see here. It is my first attempt at making a video, but it works! Enjoy!
 
Check back tomorrow to see a new dragonfly card with a stair-step fold. Thanks!

Sunday, July 12, 2015

Awesomely Artistic Fancy Fold Card

Hello! Today I'm back sharing one of my favorite stamp set from the new Stampin' Up catalog: Awesomely Artistic. It's a beautiful set that includes a dragonfly and the flowers you see below...
To make the fancy fold card you see here, I used SU's new Bohemian Rhapsody designer paper, the gold twine, along with gold and turquoise sequins. I will be posting the directions tomorrow, along with a new dragonfly card,  so be sure to stop by!
Here is a closeup of the dragonfly and the thin gold twine. I stamped the dragonfly twice - once on white and cut him completely out, and once on vellum, but I only cut the wings out of the vellum. I embossed both using gold embossing powder to give it some shine. These colors of Bermuda Bay, Blackberry Bliss, and Delightful Dijon come together beautifully, don't you think?

This card was inspired by the following challenges as well:
SUO Designer Paper Challenge
Your Next Stamp Sketch Challenge seen here.

Have a great week! Stay cool!

Sunday, October 6, 2013

You Are My Sunshine...

Hello everyone! Well, I just had a birthday last week, and some dear friends of mine were unable to come because their daughter gave birth that same night....so I had to create something sweet that they could add to their nursery. They had a boy, but I made this framed picture gender-neutral so it could be used forever!

To make it, I used Stampin Up's Sweater Weather DSP for the rosette, along with our new cream buttons and big pearls. The ribbon is a mix of daffodil delight, crochet trim, and a retired saffron grosgrain. (Email me to order!) I used SU's gold glitter paper behind the chalkboard sentiment found in a MME Chalk Studio pack. The background paper is from an old sheet of Studio Calico Atlantic City.

What new babies or crafts are in your life?:)

Linking up to these great challenges:
The Craft Place Baby Challenge
Stampin With the Dragon Yellow Challenge
Aud Sentiments Challenge - Sentiment for a Child
Craft Ribbons Challenge - Use Ribbon!
Creative Belli- Ribbons and Pearls Challenge
Fab n' Funky Ribbon Challenge
Deep Ocean Baby Challenge


Monday, September 30, 2013

Leafy Fall Banner

Happy Fall everyone! We have already been out picking apples and pumpkins even though it seems a tad early. Still, I love fall and am anxious to get it going! To celebrate, I made this fall banner by using a new banner kit by Stampin Up and a packet of Sweater Weather DSP. I hope you are enjoying fall wherever you are!

Materials used: SU Banner Kit, Sweater Weather DSP, Burlap ribbon, EK Leaf Punch. Email me to order!

Thursday, August 22, 2013

I Could Go For a Cookie...


Hi everyone! Don't these cookie treats look too sweet to eat? Well, they were gobbled right up by my neighbors, but before I tell that story, let me tell you this one. This week we have a great ongoing challenge at Simply Create Too - It's our FOR A CHILD challenge. So fun, right!? Take a look at the other awesome design team examples on the site while you're there.

For my items, I made these sweet cookie bags for the neighbors who were in our hometown play production. I thought they would enjoy these more than flowers ;) So, to make them, I did the following:
1. Put Stampin Up Washi tape onto regular clothespins.
2. Put cookies into some Stampin Up cellophane bags and secured them with the clips.
3. Stamped the trophy image and added gold glitter.
4. Used some designer label punches to "edge" the trophy and adhered the image to the front of cookie bag.

I love how these turned out! If you do too and would like to order any of the Stampin Up items, email me! Thanks for stopping by!

I am linking up to these fine challenges this week and was inspired by this image as well from The Paper Girls site...Look at those bright colors! LOVE!

Created with Love Something Sweet Challenge
The Pink Elephant Anything but a Card Challenge
The Paper Girls Pinterest Image Challenge

Wednesday, August 14, 2013

A Craft Room Dresser Makeover

Do you ever run out of space in your craft room? This conundrum has been plaguing me for quite a while... How does this happen? Could it be a paper, punch, and stamp addiction? Stacks of ribbon spiraling out of control? Yes, yes, and yes. Well, to combat this issue, I decided to revamp part of my craft room. To do it, I had to get rid of a tall dresser and round table that were helpful, but were taking up too much space. I needed some "counterspace" and storage so...while searching the mines of Craigslist, I found this lovely brown thing...
Ick-a-bod Crane. This thing needed some work, but I got it for only $20 and all the drawers slid in and out like charms, so I went for it. Three days and three layers of paint + poly later + stylin' drawer pulls, and I now have this!
I was so excited to see the progress on this piece - the first bit o' furniture that I've ever redone. The drawer pulls really make it look nice, plus add a bit more ease in functionality. To start the project, I prepped it by rubbing on some sanding-free primer that took off the original finish, then I spraypainted the white areas with Krylon Blossom White in a Satin finish. To add some contrast, I used Benjamin Moore's Stonington Gray colormatched  by Home Depot in a Behr Satin  on the lower four drawers. Finally, I applied three layers of poly over the top. The poly totally makes the colors look smooth, polished and even. Even though I was dying to get everything set up, I'm glad I waited the extra day to finish this step.

Now I have a new countertop to work on and some great drawer space to hide all the goodies. Thanks for looking!

I'm linking up to Thrifty Decor Chick Before and After for this post:)

Thursday, August 1, 2013

Festive Flurry Frame


Hello! Well, it's August 1st and that means that you can now order from the new Stampin' Up Holiday catalog! One of the items I first ordered was the new Festive Flurry framelit and stamp bundle. It doesn't disappoint! I have a bunch of frames that I am prepping to make some cute craft fair items from and this is one of them using the Flurry bundle, new blingy snowflake embellishments, and DSP. Thanks for looking!
Email me to order these great new items!

Challenges I am linking to:
4 Crafty Chicks - Use Bling
Paper Crafting Journey - Use a die or punch
Crafting for All Seasons - Christmas in July


Sunday, March 31, 2013

Stampin' Up Display Board Samples

 Greetings! I hope you like my entries for Stampin' Up's call for display board samples. These are some items I have enjoyed creating over the past few months. Enjoy!
#1 - 8x8 Scrapbook Page (above) - Made primarily from Tea for Two DSP and coordinating cardstock. I loved making the flower pop off the page and using all the vivid colors.
 

 Card #1 - A simple Easter card in Whisper White and Pool Party with some special embossing and an easel fold. The bunny is colored in and given some champagne shimmer on his egg.


Card #2 - Moving from Spring to Fall in a hurry, this is a fun fall card that uses SU's new coordinating cardstock and some ever-playful buttons albeit with some retired leaf stamps.
Card # 3 - Love Card - Made with the Artisan embellishment kit and lots of other fun details. The flower trim roses are showing up on all my spring cards.

 3-D Item #1 - I love making 3-D items, so it was tough to choose only two items, but this is one of my favorites from Christmas using SU's fabrics, the new framelits, and some DSP'd clothespins. I put some cocoa and treats in these to give away as gifts. They were so fun and easy to make!

3-D Item #2 - Spice-Cake Wreath- I needed a new wreath for our front door and got excited about the burlap craze. I think the Spice Cake fabric is so pretty and perfect for fall.
 
Those are my entries! Thanks for stopping by!


Thursday, March 28, 2013

Spring Bird Pedestal

 
 Happy Spring! I hope you are enjoying the sunshine where you are and that it inspires you to do some creative, kind things for someone else. Today I was inspired by the Late Night Stamper 3D Challenge to create this sweet little bird decor item. I have the perfect shelf for him! You can find the steps for  how I made it below, and it's so easy, you can do it too with just a bit of paper, a block, some rosettes, and your own little spring statue. Some other great challenges I would like to enter are:
D. L. Art - Spring Inspiration Challenge
Crafting By Design - Vintage Easter/Spring
Crafting for all Seasons- Anything but a card
Frilly and Funky  Challenge- Easter/Spring gifts not in a basket
Easter Impression - Easter/Spring
Craft Room Challenge - Anything but a card


Steps:
1. My block is a retired Stampin Up Decor block that is 3x3, but you could use any wooden block. I cut my Tea for Two DSP from the Spring Stampin' Up catalog to fit each side and adhered it.

2. For the base, I used the large scallop square Sizzix die and cut one square from Crumb Cake CS.

3. I applied mono around the bottom of the block and applied the rosette flower trim strand all the way around until I had enough and then I cut the end.

4. To add some interest to the sides, I punched out some pretty images from the same Tea for Two DSP and backed with colored CS like you see with the roses above.

5. I also stamped "My Thoughts are Happiest when you're in them" from the Field Flowers stamp set and backed it with a scalloped piece of green DSP.

6. I had the glass bird already, so I just set him on top. If I find a cute bunny rabbit, I might swap him out, but he looks good there for now!

Thanks for Looking!

Monday, March 18, 2013

Goodbye SAB!

Well, it's just about time to say goodbye to SAB, and so here is my very tangerine card that suggest a nice ride off into the sunset of retired items. Enjoy! I made this to play along with Late Night Stampers' New challenge!

Sunday, January 13, 2013

Raspberry Cocoa Holder

 
Brrrrr! It's cold here in the frozen tundra that is Minnesota at this time of year, so thinking up a snowman project for Late Night Stampers challenge wasn't difficult. I also added some textured elements too for the Clear It Out Challenge which requires "warm fuzzies" and/or a stash item of patterned papers. I got this cocoa holder idea from Stampin' Connection and just tweaked the colors and theme. What inspired the colors of orange and raspberry ripple was the Raspberry cocoa package I had. Normally, I doubt I would ever have paired these colors, but it came out looking vibrant and different. Thanks for looking!

Here's how I made it:
1. Cut a piece of Early Expresso CS 8.5 x 5.5. Fold in half. Unfold and use your trimmer to cut a notch off one corner.
2. Embellish the front by adding DSP (here I used Twitterpated & Sycamore Street.)
3. Stamp snowman image and sentiment on white, punch out and color.
4. Add new Delicate Details Lace tape across bottom.
5. Tie ribbon around card and add cocoa inside!

Thursday, January 3, 2013

Having Fun on Sycamore Street

Before you know it, Stampin' Up's sale-a-bration will be in full swing, and you will be able to get "Sycamore Street" - a new gorgeous designer paper. I had some fun this weekend putting some vibrant cards together. Check them out!

Hello Card Details: Not Quite Navy CS, Tangerine Tango CS, Sycamore Street DSP, Small Scallop Punch, Elegant Bouquet Embossing Folder, White CS, old Hello stamp,  Pop-up-Posies Designer Kit ($12.95 available now from new Spring catalog!)
 
Just Because Card - Not Quite Navy CS, Whisper White CS, Woodgrain Embossing Folder, "Just Because" sentiment from upcoming Sale-a-bration Vintage Verses set, Sycamore Street Ribbon, Rich Razzleberry flower with Champagne glitter center.
 
Enjoy your day! Email me if you would like a new Spring Catalog!

Saturday, September 29, 2012

Sweets for the Sweet...

 Love is in the air whenever there's a wedding, and my husband and I recently were in Chicago for a fun wedding. This is a copy of the card I made for the happy couple.

One of the couple's colors was a Tiffany blue, so this card features Baja Breeze along with some Cherry Cobbler and white instead of pink.  I tried to do a box pleat along the bottom of the card which didn't really turn out, but it still looks acceptable, so there we go!
 

I thought this card would work for most of the CCMC challenge this week. Thanks for the visit!
Made also for this fine challenge:
Art Impressions Banners and Bunting Challenge